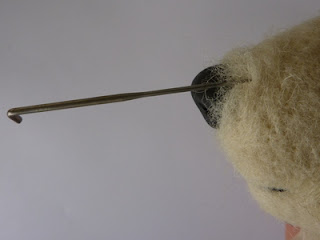
My Fimo nose is now ready to be attached to the bear face!
I want it to be firmly attached, so that it doesn't come off, and it doesn't move. I use both glue and thread to be on the safe side!
My personal choice as materials go is:
-Thread: waxed dental floss. It is very resistant.
-Glue: Pattex repair extreme. It is not important the brand. What I like is that is is an extremely resistant glue, good for binding practically any material, and not too fast to dry. I don't want glue such as loctite that dry too fast and give no time to adjust your nose position!
Step1
Take a long thread of dental floss (about 60-70 cm) and double it. Insert it doubled into your needle. You will need a long sturdy needle (a doll needle).
Step 2
Insert the needle into the hole previously made on the bear nose area. (See TUTORIAL on making the nose).
 |
| The 'nose hole' |
The needle should go through the head. About a third of the thread should come out back. The rest you will need in front.
Step3
Take the thread that is coming out of the 'nose hole' and insert it into the nose metal loop.
Step 4
Insert again the thread into your needle.
Step 5
Insert the needle into the 'nose hole'. You should go exactly where the other threads are.
Your needle should come out close to the back threads, but not exactly in the same spot.
Step 6
Now you have to move the exiting threads so that they come out of the other threads' hole. This is so that when you will later bind them together, they will disappear into the head without breaking the fabric. To do this:
-insert back the needle through his exiting hole and direct it towards the other threads hole.It should come out through exactly the same hole.
It is hard to explain, a picture will help understand:
Now all threads come out the same hole. Grasp them all and pull tightly, to be sure that they are all evenly pulling your nose in place.
Step 7
Pull your nose out about 3cm from the muzzle.
Put a generous drop of glue on the nose back, all around the metal loop. Careful not to put too much, and keep it clear from the edges.
Step 8
Holding the nose from the sides, gently pull the threads that are in the back of the head. They will slowly pull your nose towards the muzzle. Check that the nose orientation is right while you are doing it. Your glue will give you time to make adjustments after the nose is in place. When the nose is properly positioned, pull the threads some more so that the nose fits snugly on the needle felted muzzle. Clean any glue that might have come out the edges.
Step 9
Let your glue dry. Don't be in a hurry to knot the back threads. If you work on the knots while the glue is not dry, you might move the nose...and end up with a lopsided one! :-(
Here is the nose waiting for the glue to dry.
Step 10
When the glue has dried, you are ready to tie the threads on the back of the head. I always find it irritating when the fur gets caught in your knots. My personal solution to this little problem is a disc of paper with a hole in the middle. You put the threads through the hole, and the knotting has no hair caught!
I tie four knots, quite tight so that they go through the fabric into the head. Then, using my doll needle, I take all threads through the head a couple of times, always going back in where they come out. After that any loose strand can be trimmed away.
At this stage, I could be happy with my nose and let it be. But no. Even when molded on the bear face, the Fimo nose to me looks a little like what it is: a nose that has been attached to the bear. I want it to have a natural look, to blend my nose as best as I can to the face.
BLENDING THE NOSE TO THE BEAR FACE:
Take some wool - the same you have used to needle felt the face. It should be the right length to go round the nose.
Poke it with your needle a little on the sponge, but don't felt it too much. Then put it around the nose, with the two 'tails' meeting under the nose. With your needle start poking in that area until both ends of the wool strip are attached to the muzzle.
With your needle, poke the wool all around the nose. You want this wool to be perfectly blended with the previous needle felting, but some loose wool should be left on the nose edges. You can repeat the process if you think more wool is needed to fill the gap.
This is the final result. It is a matter of personal taste, I like this finishing a bit loose, the needle felting not too hard.
After that, my nose is ready for the final touch...shading!


