martedì 5 marzo 2013

New projects

I have three new creations under way. I never had so many all together. I started with another fox cub that I wanted to make with some beautiful fur bought some time ago. When I was cutting the pieces, I kept browsing Google for images of puppies.
I do it often, I go on Google image and look for pictures of animals to inspire me. I store them all in a folder for future use. Normally I do one project at a time, but this time....I woke up the other day and I felt like doing some designing.

End result? Now I have a design for a dog puppy that I really like. I like it so much that I decided to try it out on two very different kind of furs.
One is an extremely long (85mm) and fluffy white mohair. The idea is a Maltese like puppy. Not an exact copy, but something like that.
Fox cub project on the right, Maltese puppy project on the left

The other will have a very short (3mm) black and white mohair fur.

It is always interesting how totally different results you can get by simply choosing different furs. I think this proves that OOAK is not so strictly related with using the design only once. 
Just look at those pictures of both puppies when the pieces are sewn but not yet turned right side out.


They look basically the same.
It will be interesting to see how different they will be at the end!

Pin It!

sabato 23 febbraio 2013

RICCIOLINO a new baby hedgehog

It is snowing again...but my new creation, a baby hedgehog, already enjoys a touch of spring.
He's a sweet little fellow, and I had great fun designing and crafting his flowery nest. I think he is as cute as can be! :-)


He is now available for adoption on my Bearpile shop:
http://www.bearpile.com/item/65429
Ricciolino is now adopted! Thank you!

Pin It!

domenica 10 febbraio 2013

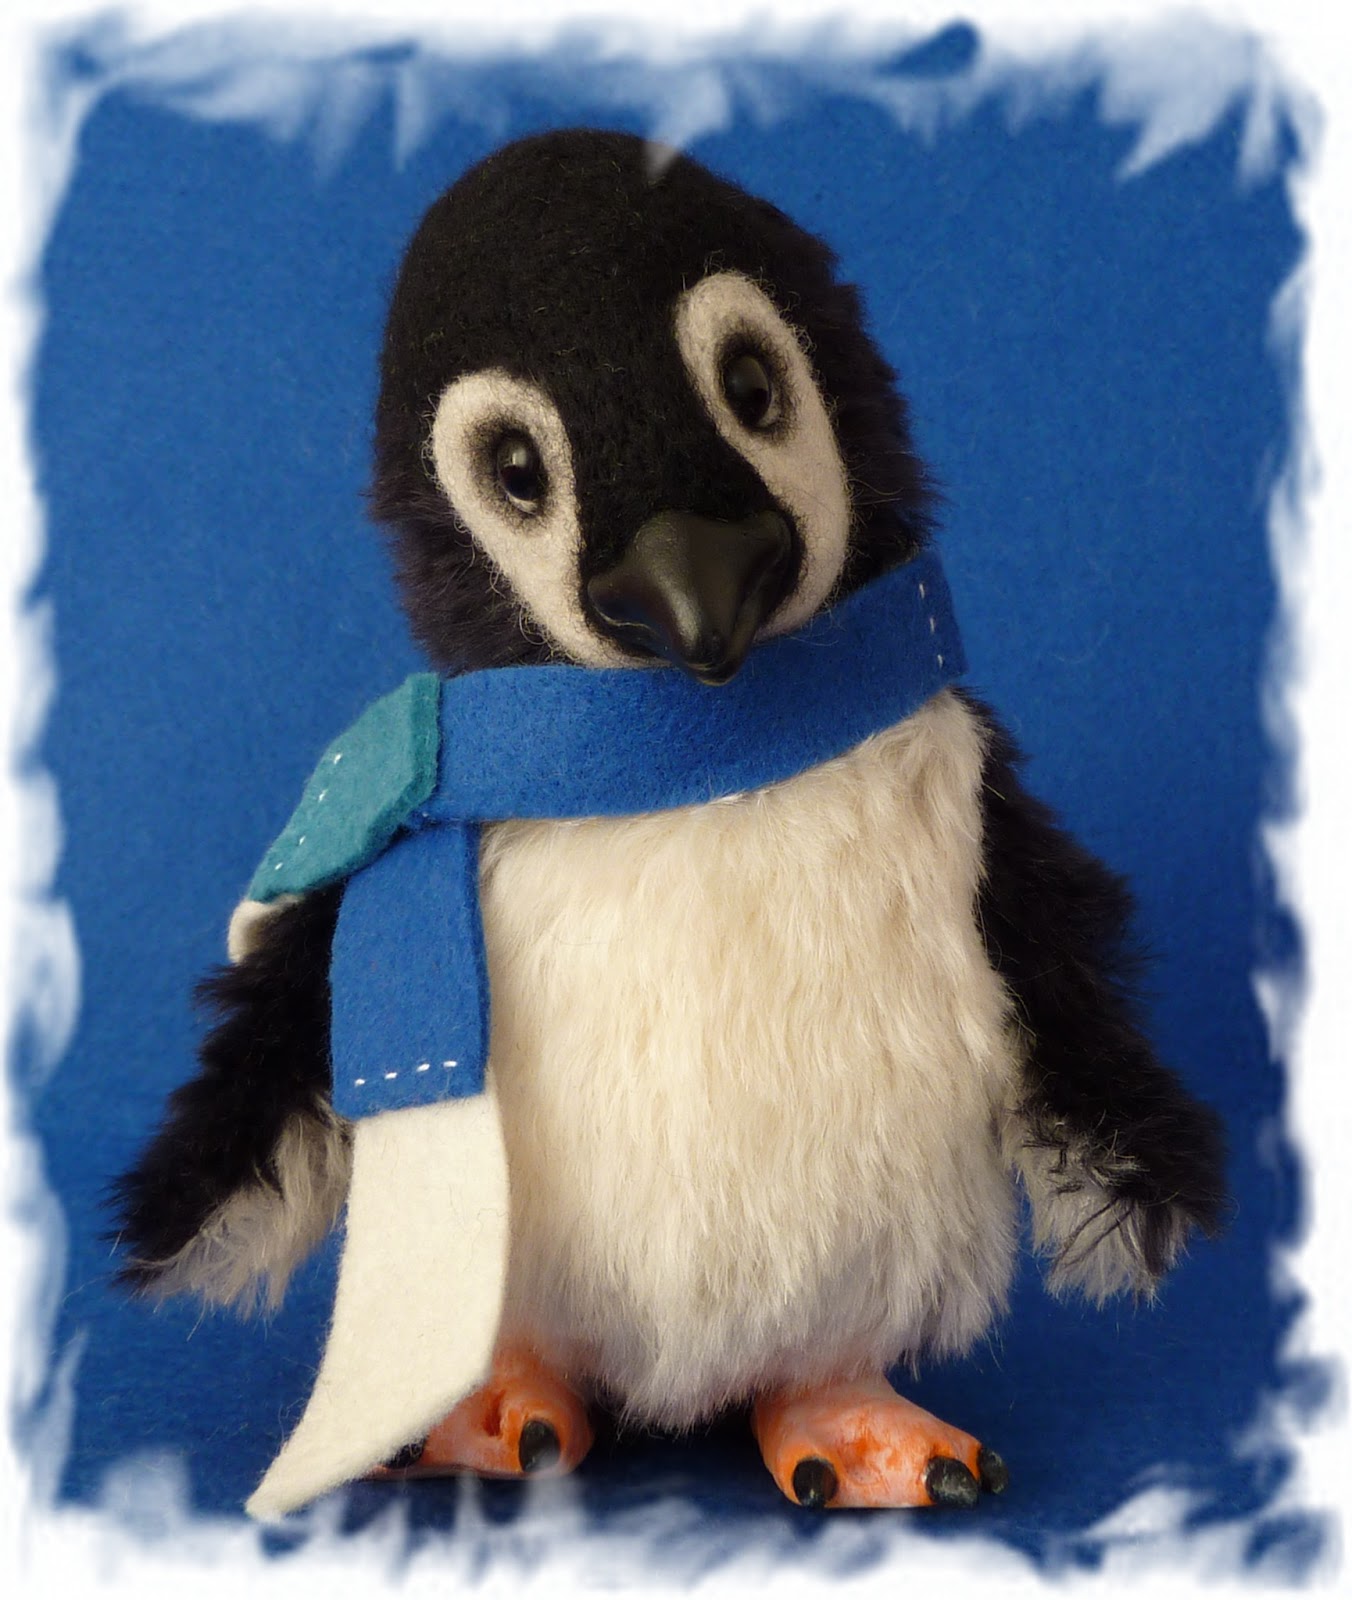
ZAC the penguin

I have found some time to finish my second penguin. I left him aside for some days because I wanted to get my polar bear cub finished...
I think this little one came out cute! This time I chose the typical adult penguin colours, black and white. And his feet are the ones that I have shown in my tutorial.
Here he is, Zac the penguin!


He's now available for adoption!
http://www.bearpile.com/item/64932

Pin It!

sabato 9 febbraio 2013

DODO...and his felt fish!

I took more pictures of him with his felt fish. Isn't he cute? :-)


Dodo is adopted, thank you!

Pin It!

venerdì 8 febbraio 2013

DODO the baby polar bear

It took me a lot longer than I thought to finish this baby polar bear. I must blame it on my perfectionism. I started rooting in some alpaca fur into the needle felted muzzle so that the transition from the needle felted area to the fur looked more natural. And I just couldn't stop. I kept adding and adding...at some point my subconscious must have decided that all the needle felted area was going to be covered. We are talking hours of work, what with the fur rooting, and the scissor sculpting I had to do afterwards. But. There is a but. And it is, that I'm very pleased with the result. So, it was worth it, I think!
And finally, some pictures.
This is Dodo.


Dodo has wiring into all four limbs, and he has a wire spine. You can pose him in practically any way you like!
I am doing a red  felt fish for him, I think he needs a bright accessory to complement his whiteness.

Pin It!

sabato 26 gennaio 2013

Polymer clay penguin feet- FREE TUTORIAL

As I designed my new pattern for a penguin this month, I devised a way to make and attach polymer clay feet. I wanted to make them of that material to give a more realistic look. I don't know if I found an original way to do it, or if it is already widely known. Be as it may, as it succeeded, I will share my 'experiment' here on the blog.

POLYMER CLAY PENGUIN FEET - TUTORIAL

Step 1
What you need:
-Polymer clay (I use Fimo)

-Two cotter pins, four disks.
The pin and disks sizes depend on the size of your animal. I used 1 1/4 inches (35mm) cotter pins, and 18mm disks. I would suggest to use the longest cotter pin you have, as a part of its length needs to be stuck into the clay.


-Strong glue
-Acrylic paint

-Semi-gloss varnish, suitable for Fimo

-A brush
-Toothpicks

Step 2
Take two chunks from your clay batch, and roll them into identically sized balls. Again, the quantity depends on the size you want your feet to be. You might need to add or subtract material as you work.
Step 3
Insert the two cotter pins into each one of the Fimo balls.
Step 4
With a toothpick, roll some of the material from the edge of the ball, towards the center where the pin is. Smooth it to have an even surface. The head of your cotter pin must be securely embedded into the Fimo ball.
Step 5
Insert a disk in the pin and push it so that it is against the clay.
Step 6
Start sculpting your shape.
The disk should give you the dimension of the leg diameter.
As for the shaping goes, there are no rules, shape the feet as you like!
Some pictures of my sculpting process:
 I mostly do my sculpting with my hands and with the aid of a toothpick. I gently roll it on the clay surface to make it even.
 Remember to check that the two feet are evenly sized, and most of all, that they have the same height from the cotter pin to the base!
Step 7
When you have done with your sculpting, remove the disks.
Now it is baking time! Bake your two feet following the clay instructions.
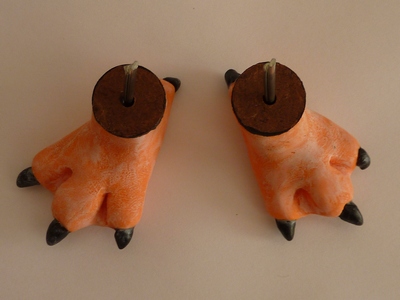
Here is a foot already baked!
Step 8
Sand both feet with fine sandpaper, then wash and dry them.
Step 9
Now take the glue, put some around the disks hole, and insert the disks back on your legs. Let it dry.
 
Step 10
When the glue is dry you can proceed to paint and shade your feet. Again, here it is a matter of preference.
In this instance I have
-applied very little white acrylic with a dry brush, for a very subtle effect, on the whole feet surface
-painted the nails with three layers of black acrylic, then slightly shaded them with white for a 'worn' look
-covered with semigloss varnish, to protect the colours
 I let the feet dry upside down with the pins inserted on a needle felting sponge.


Here is the end result.


I have painted the rim of the cotter pins with black, as the fur of the area where the legs will go is black, and it will blend better.

Step 11
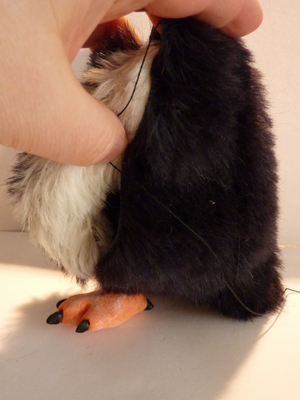
Now your feet are ready to be attached to the body. You can do it as you would with any other limb.
 Here is my next penguin...well, only half of him yet... now, he has feet!


Pin It!